Site builders have the ability to re-order menu items, as well as edit existing menu items and add new menu items.
On the Site Builder Dashboard, in the "Administer Menus" section, you can click on "Manage links" for a specific menu (e.g., "Main Menu").

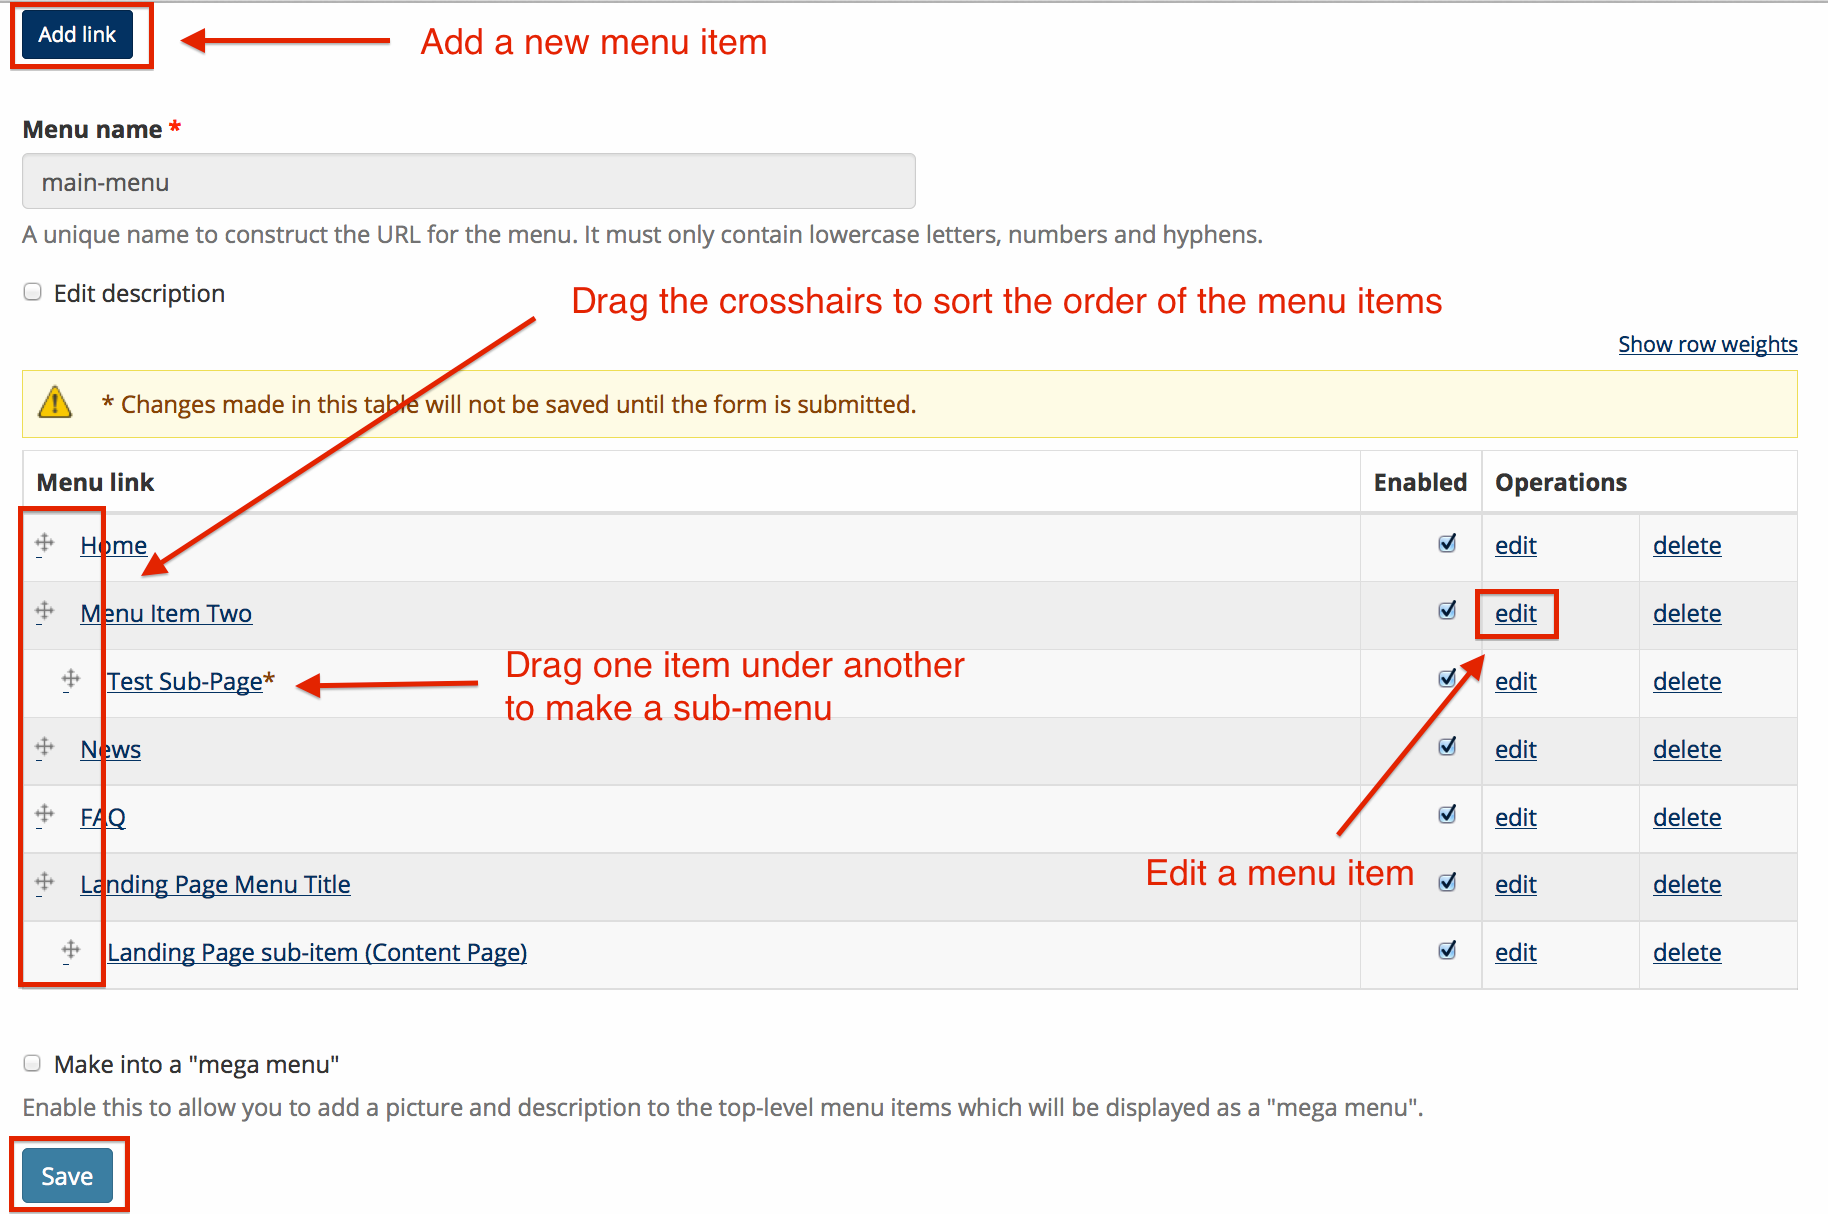
You can add new items to a menu, re-arrange the order of your menu items (drag one item under another item to make a sub-menu), and edit existing menu items.
You can also move an item to another area of the menu while editing a page directly. When editing a page, in "Menu settings," click the "Parent Item" drop down and select where you would like the page to reside (see Add/Move Content in the Main Menu).
Managing Main Menu Items
NOTES:
- Adding a main menu item manually from the "Administer Menus" interface should only be used for special circumstances. The best (and easiest) way to add a new menu item is by following the steps to add/move content in the menu (and then the items can be easily moved/re-ordered by following the steps below).
- Menu items can be disabled using this interface by un-checking the "enabled" button. This should only be used for special circumstances (such as disabling the default "News" and "FAQ" pages), as it can be easy to forget that this action was taken, and might cause confusion (instead, consider either "unpublishing" a page, or un-checking "provide a menu link" for a page - see Add/Move Content in the Main Menu). If you would like to remove the default "Home" link from the menu, see Edit the Home Page.
- If a "parent" page in this interface is disabled, then any child items will remain in the menu, but will not display in the main menu.
- The "show row weights" option within the menu drag-and-drop interface can be ignored. Using this option is more challenging and will require you to manually configure the structure of the menu, and will cause the drag-and-drop option to disappear.
You can drag and drop Main Menu items using the "Administer Menus" interface as described above. If need be, you can also edit Main Menu items.
Managing/Adding Items in the Secondary, Quick Links, or Footer Menus
The Secondary Menu and Quick Links menus are optional (you can add links as desired to those areas).
The Secondary Menu is located in the big blue bar at the top of the page, next to the search box. This space is limited, and should only contain a few menu items at most:

If you would like to feature more items in the big blue bar at the top of the page (more than the amount of space allows), consider using the "Quick Links" menu (see Use Quick Links Menu), which will also display in the secondary menu area, but will allow you to fit more links into an additional pop-up menu.
The footer menu, by default, contains important "Credits" and "Privacy Statement" information, as well as a link to the Home page. We recommend not removing the default links. You can add a couple of additional items to the Footer menu if desired, and re-order the items as well.

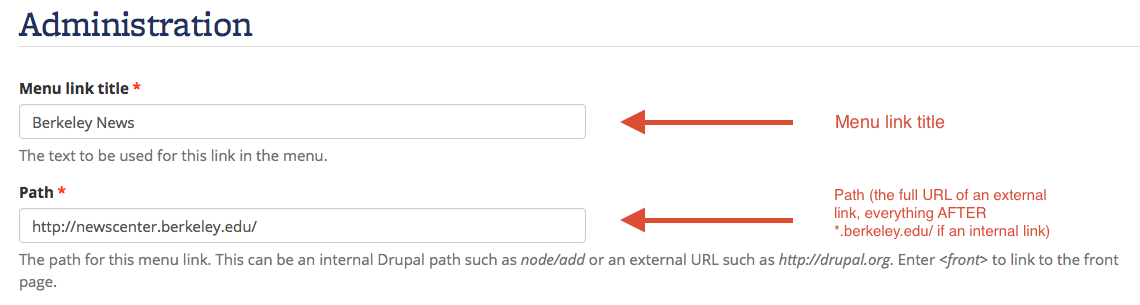
To add link items to the Secondary or Footer menus (or to the Quick Links menu after you have enabled it): On the Site Builder Dashboard, in the "Administer Menus" section, click on "Add New Link" for the menu you'd like to modify:
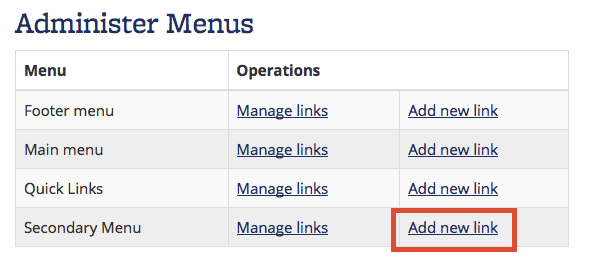
Add the title of the link (the text you'd like to display in the menu). Then, add the path. If this is an external link, add in the full URL path of that link. If this is an internal page, make it a relative link (everything AFTER the *.berkeley.edu/). Then hit "Save."