Your full list of User Accounts can be found on the Site Builder dashboard (select "Dashboard" in the upper left corner), or from the "Dashboard" flyout in the black admin bar.
How to Manage Users on Your Site
Site Builders may perform the following actions on the User Accounts page:
- add roles (new users)
- change and add roles (existing users)
- remove user roles (existing users)
Add roles to new users
- Ask the new user log in to your site first. Ask them to visit http://[yoursite].berkeley.edu/cas and log in with their CalNet ID and passphrase.
- The user will show up in the User Accounts list, with no role.
- Select the checkbox next to the user's name.
- In the "Operations" section, select the "Choose an Operation" drop-down
- Select "Change User Roles"
- Select "Execute"
- Select the appropriate role from the "Add Roles" section
- Select "Next."
- Select "Confirm" to confirm and complete the process.
See Figures 1 and 2, below.
Figure 1

Figure 2

Change or remove user roles
You may need to change a user's role, or remove a user's role. To do so, follow steps 3-6 in the above list in the "Add roles to new users" section.
- To change a user's role, select the appropriate roles from the "Add Roles" and "Remove Roles" section (see Figure 2, above), then select "Next".
- To remove a user's role, select the role(s) from the "Remove Roles" section (see Figure 2, above), then select "Next".
Navigate the user accounts list
The User Accounts page has several filters across the top. These filters may be used to navigate your User Accounts list, especially if your site has a long list of User Acccounts. You may filter by:
- Name
- Roles (with multi-filter selection)
After using one of the filter options (e.g., typing someone's name in the "Name" field), select the "Filter" button to apply the filter. Select the "Reset" button to reset the filters.
The multi-filter "Roles" selection is useful if you have any User Accounts with more than one role assigned to them (e.g., Editor and Widget Editor). If your website has a long list of User Accounts, and if there are any users with more than role, use the multi-filter selection to find multi-role users. To select more than one role from the drop-down, select one role first, then use the "Command" key (Mac) or "Windows" key (PC) to select additional roles from the list. See Figure 3, below.
Figure 3

CSV Export
To download a list of all of your User Accounts, use the "CSV" button in the bottom left corner of the User Accounts page. When you select this button, a CSV spreadsheet will be downloaded. See Figure 4, below.
Figure 4 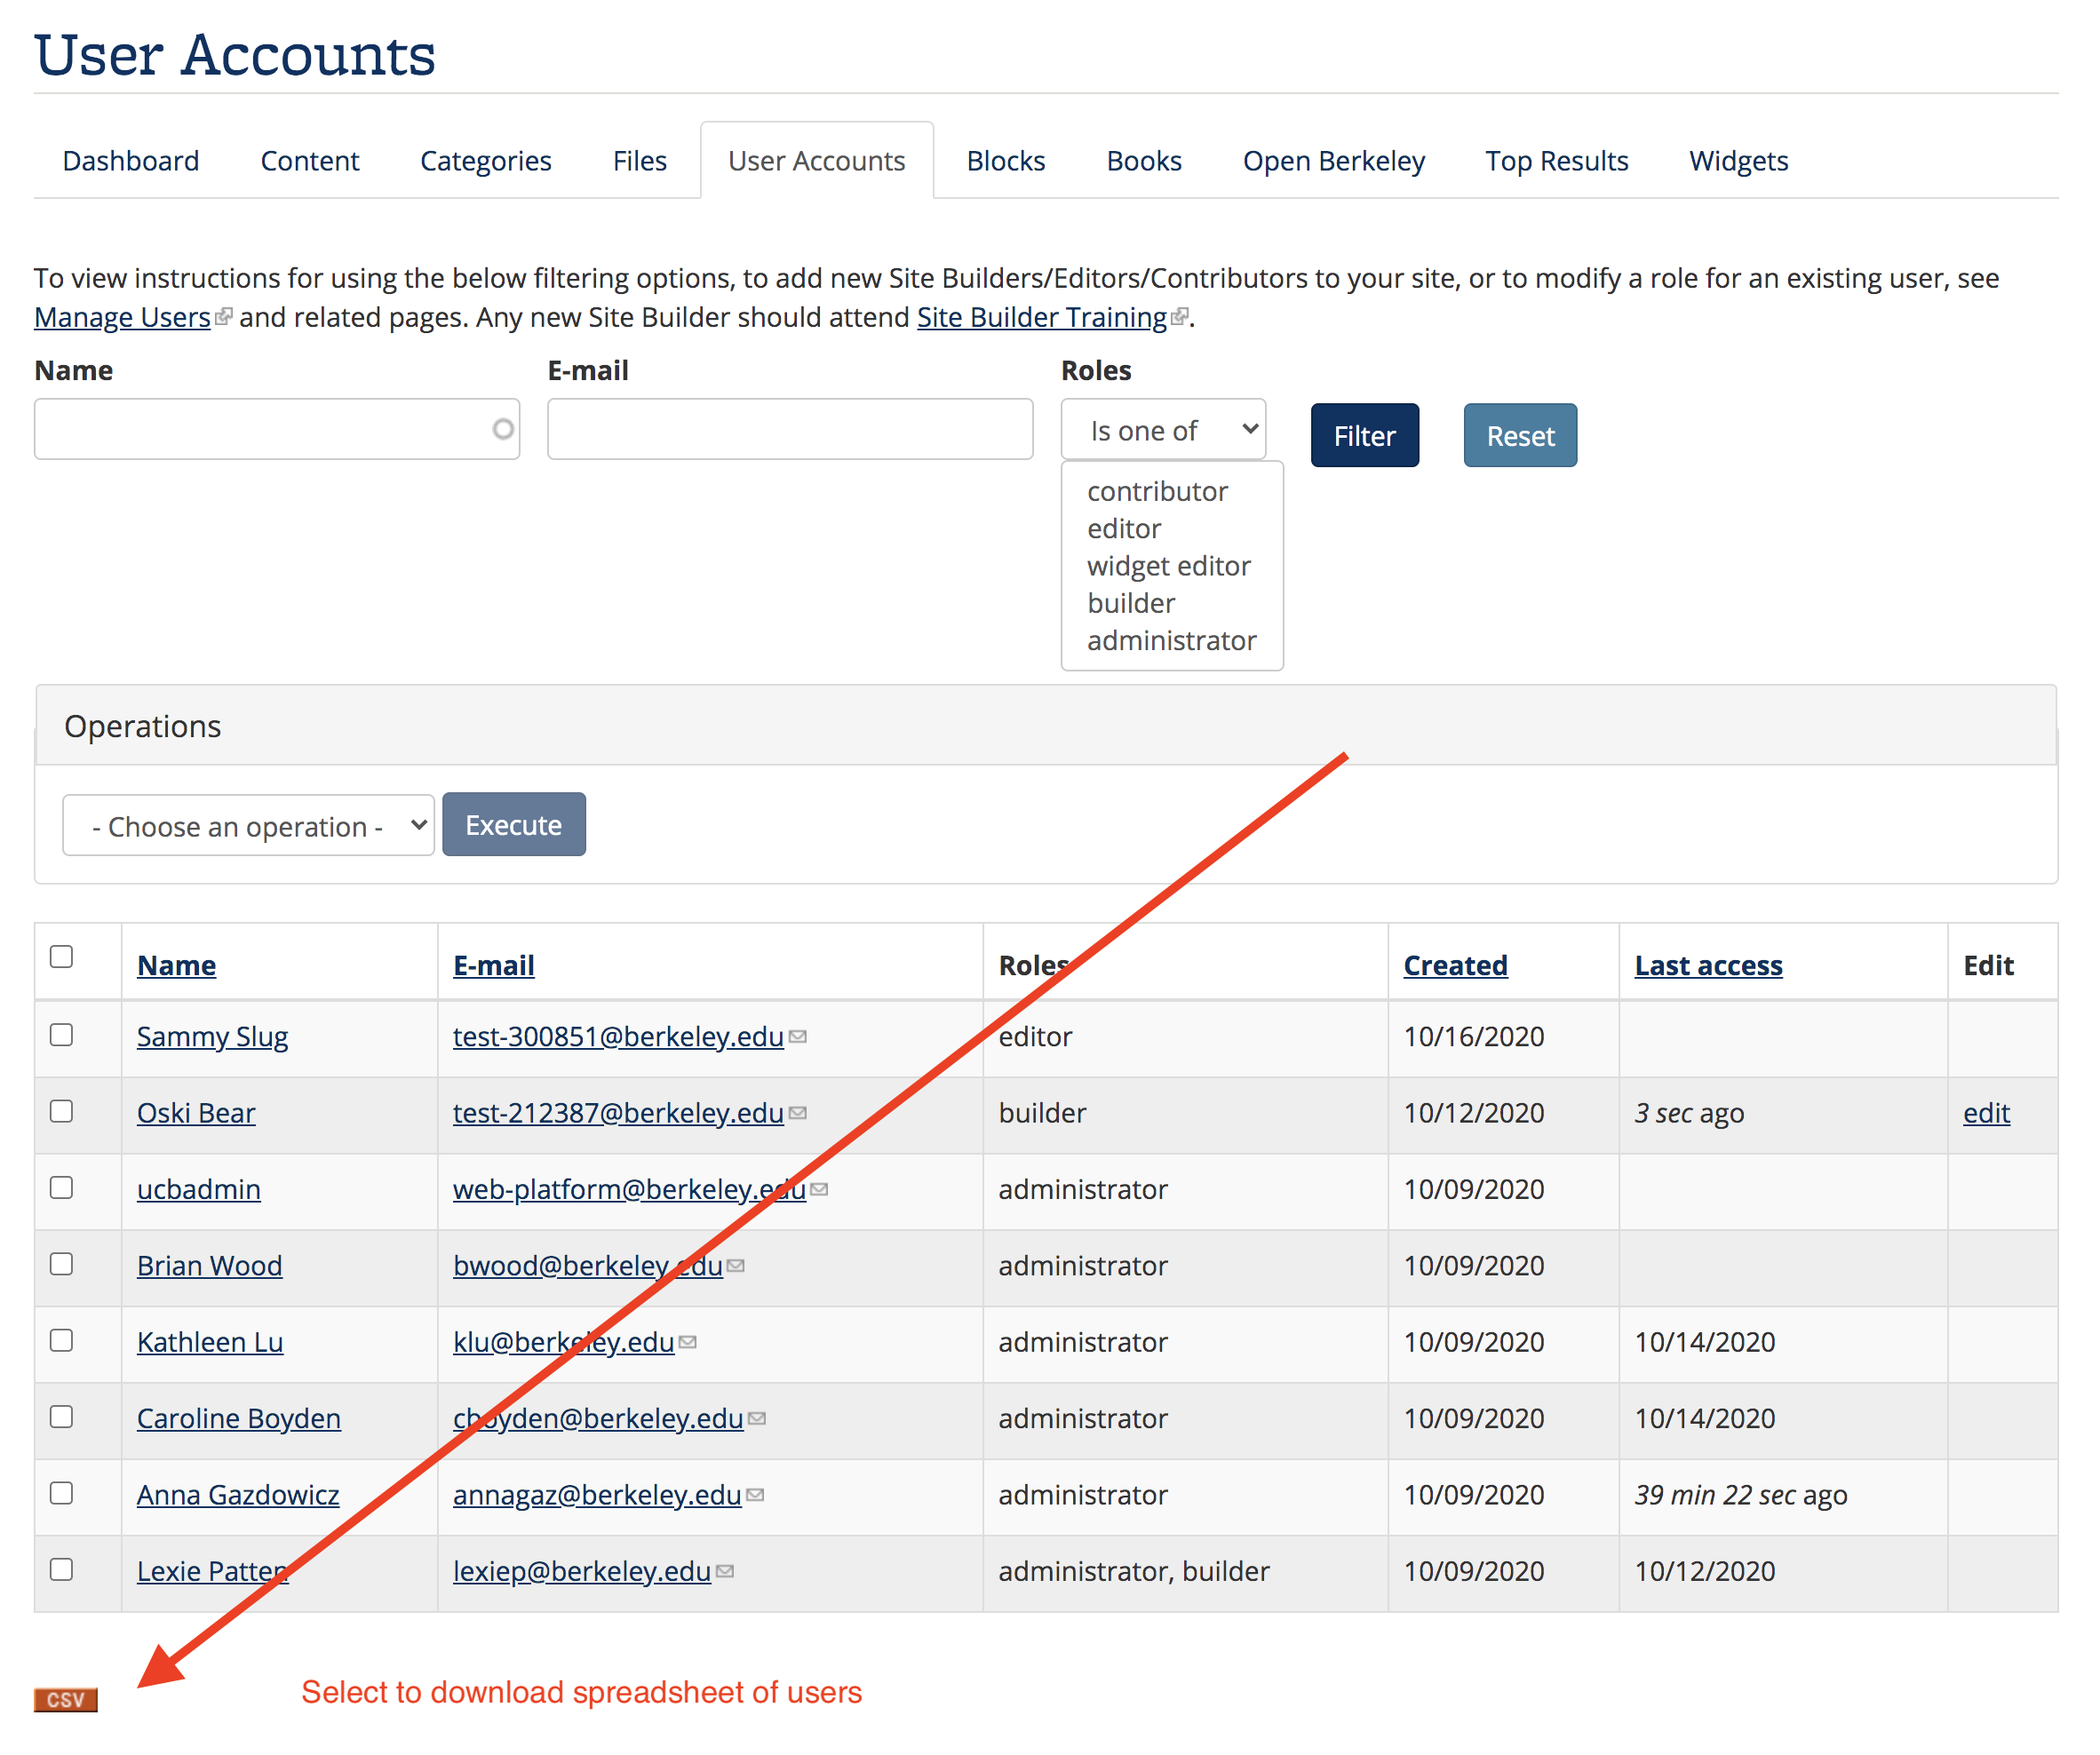
Update user display names
In accordance with the Gender Recognition and Lived Name (GRLN) policy, account usernames are pulled from the appropriate system of record (UC Path for employees; Student Information Systems for students) via the CalNet directory. If a user would like to update their "display" name on an Open Berkeley site, they may do so by updating it in UC Path or SIS. It may take a day or so for updates to propagate into the CalNet directory. Once CalNet has their updated name, the account username will be updated the next time the user logs in to their Open Berkeley site.